
Welcome to the Inertinite biochar revolution! Here's an entry level system at the bottom of the market to get you experimenting for sustainable adaptation!

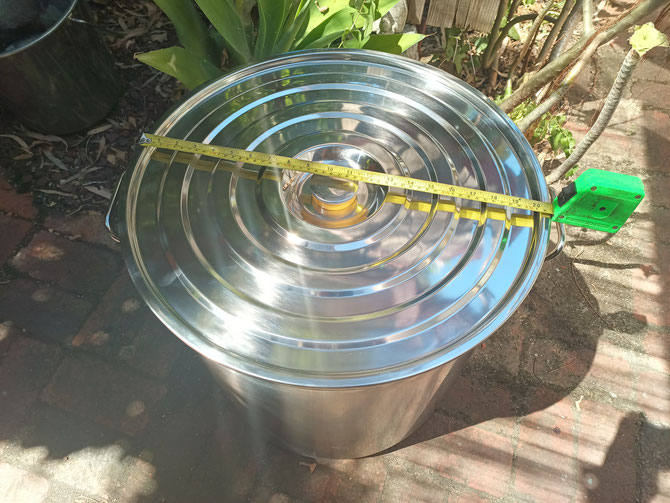
The 'Stockpot Biochar System' (SBS) in this case uses a 100L stainless stockpot (which can be scaled up or scaled down in volume) and could be viewed as a '6 in 1' system:
- Mobile firepit
- Cooking and WASH eg. water boiling or pasteurisation
- Biochar or BMC maker
- Biochar inoculator
- Biochar Carbon Removal (BCR) for Inertinite
- Educational and market entry level tube Top Fed Open Draft (TFOD) biochar kiln
Although the software at the top probably looks unnecessarily complicated, it could be a lot more complicated. I'm betting that at most, half a dozen goes and you'll master char making in a Top Fed Open Draft (TFOD) biochar kiln. The growing skillset is more complicated but there's lots of information around and people to help you along the way, including this website.
So, here's another 'Sustainable Adaptation' for small batch runs of biochar or BMC for trying out different ingredients eg. manure, microbes, different sea kelp products etc and growing food and medicine. This is a soil-free system, similar to CompoChar's take on BMC but made with different pyrolysis technology - a stainless 100L stockpot, using standard Kon-Tiki biochar kiln operation 'software' (with a few mods) treating the stockpot as a TFOD miniature tube kiln. I'm also going to add some 10mm thick steel blocks beneath the base for a hotter fire which will increase the surface area of the BMC for increased microbe habitat, slower release minerals (fact check) and water adsorption.
I think it's also aesthetically pleasing and good stress relief building a fire, one layer at a time which is possibly more fun than your average firepit - with the bonus of biochar/BMC at the end. The horizontal layering technique for a kiln this small size is experimental. I imagine that each feedstock layer would be added across the diameter of the stockpot placing it around the outer circle until the top of the fire is covered with feedstock (for a limited Oxygen supply - TFODs are also called 'flame cap' kilns), which might end up being a couple of inches thick, depending on the feedstock thickness.
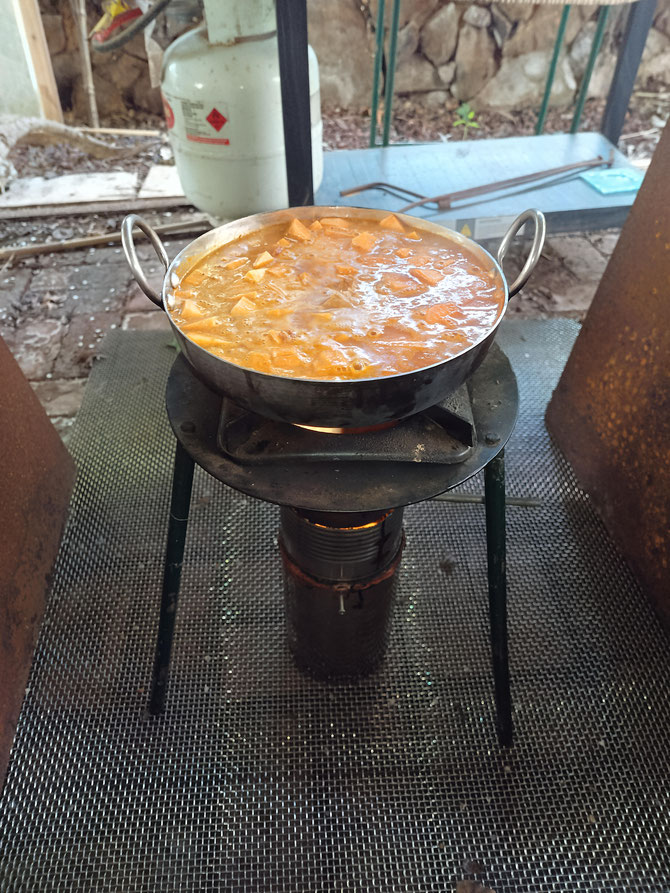
What I worked out from my 'Pyramid biochar kiln' was if you want to cook/boil and make biochar with a TFOD, it's easiest to cook/boil once the base layer is established. Then when you're done, start adding the layers for the biochar/BMC. The 'Pyramid biochar kiln', under the 'Resources' page is a good option for small biochar/BMC batches and supports local manufacturing - but it will cost more than an off-the-shelf cheap and imported 100L stainless stockpot. I only paid AUD$145 for mine (as opposed to what some people are paying for poorly designed TLUD firepits for 'smokeless' fires without chimneys and biochar production) and the quality is surprisingly great and should last a lifetime.
The SBS is a good, hopefully affordable, entry point into DIY biochar, not the most fuel efficient idea but higher volumes of char are produced from a burn compared to a 2 litre TLUD stove. It's a good time to mention what I call the 'Biochar technology equation' here to help guide you to make the right biochar technology choice. The main variables are:
Number of units x Volume of units x Frequency of burn x Time (feedstock growing, harvesting, processing and drying time + burn time) x Application volume and material requirements
The 'Permastove Kitchen' (see the web page above), with 1 or multiple units, is really the ultimate for small-scale biochar production, fuel efficiency and cogeneration for cooking, boiling water, power etc. but I'm giving the SBS a higher priority ATM. Maybe, if you enjoy making small batches and want to build out larger biochar-based growing systems (or whatever you are using the biochar for), it would be time to upgrade to a KTE, which I am currently selling to the Australian market, or build your own using local manufacturing if you can access and afford it. Visit the KTE page above for more info and if you're really keen, there's a user manual for free download at the end of the page.
***
I will add the BMC to fabric pots on the North side of my house ('Zone 1' Permaculture) for plenty of mottled sunlight and easy access. The 56L fabric pots will be used for growing herbs and vegetables, mainly for their breathability which should be good for microbiology in the BMC. For eg., biochar paint for indoors is proven in stabilising humidity which is likely due to it's breathability (good for a wine cellar). I estimate one complete burn of the SBS will provide enough BMC + inoculation for one 56L fabric pot. Air pruning is another advantage of fabric pots, preventing root balling and promoting smaller feeder roots which should be good for small trees in the 78L pots. Keep in mind though, as with the stockpot, the fabric pots/'Root pouches' linked below are imported from China - maybe a business would be interested in making them in Australia out of organically grown hemp (?biochar) fibre - or something else that adsorbs and wicks moisture without adding to material C emissions?
https://www.upontherooftop.com.au/collections/root-pouch?gad_source=1
I won't be able to test the system until May 1 when the fire restrictions are eased.

Following breakfast, If you're not using urine to quench a burn at the end of biochar/BMC making, why not throw in some food in Al foil for retrieval after the burn for dinner?


In the above 2 scenarios (and there are many more), cogeneration while building a hot base fire before a biochar burn is a fuel efficient idea. For a stable platform/'stovetop I used an arc of 2.5mm 304 stainless that I was going to use to make a Japanese 'Moki' kiln but it was too strong for rolling into a small cone. In the photo below, I've marked out 8 fins off the bottom of the arc, 2 stove holes with 4 fins each, an extra V hole at the top for more airflow (with an afterburner effect) and space for 2 collapsible 1" 304 stainless square tube legs on 304 Butt hinges.
There's still access for adding biomass feedstock to the fire at the front eg. poking some sticks or thin bamboo into the fire. The best chance of success with this design, and others, is something culturally appropriate and sustainably adaptive. In Oz, this could be a day off or weekend operation for a bit of downtime, food and fun while producing a valuable material, BMC for your growing systems, biochar for water filtration or whatever other needs you have while helping the climate cool down. It could also be your main stovetop ...why unnecessarily complicate your life if you don't need to and/or can't afford to? It's an inflation buster too.
For a good time, biochar time.

Alternatively, a 1m long galv square tube (AUD$20) cut in half (with a grinder) to support a AUD$35 cast iron double-sided griddle could work too using less steel than the Moki arc and are off the shelf. A AUD$23 15 litre stainless stockpot could be placed on top of the griddle. The 100L stainless stockpot cost AUD$145.
Total system cost: 145+20+35+23=AUD$223. Eat your heart out Solo (they even copied the TLUD and pizza oven/Bakerstone idea on the TLUD page).
Once again, the biochar/BMC yield is less for a dedicated TLUD compared to the SBS. It may take 50 burns on a TLUD with a 2 litre fuel reactor to match the same yield volume (~50+ L) of a 100 litre SBS for one burn. If you can only access biomass pellets, then I suggest a TLUD stove. If you can access more feedstock, and even manure, then I suggest giving the SBS a crack (opening those plant cell walls for high surface area on the nanoscale).
'Top Fed Open draft' V 'Top-Lit UpDraft' stockpot
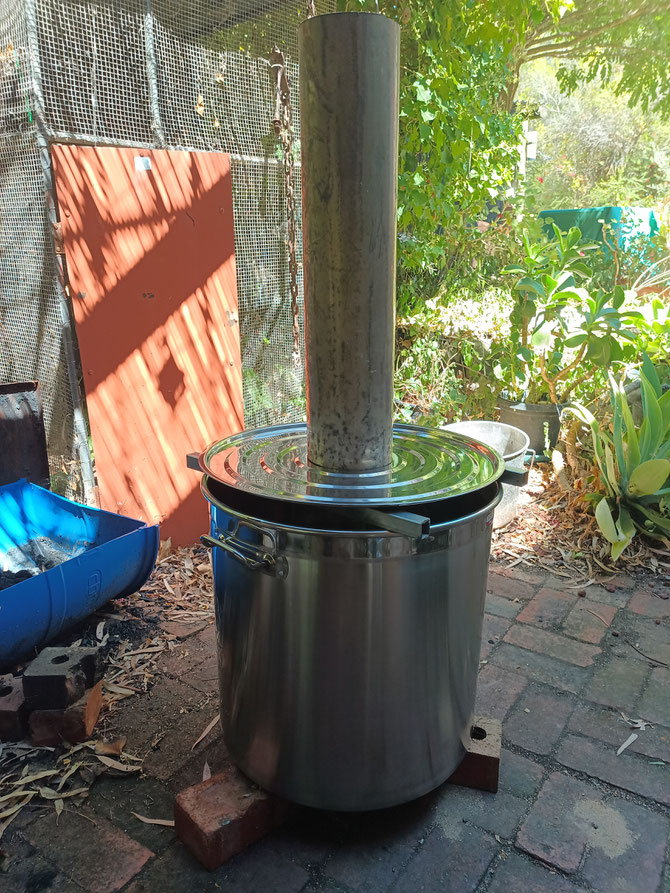
If progressively building a fire and cooking a meal with cogen using the TFOD software at the top doesn't suit your needs, the 100L stockpot could be turned into a TLUD (without an inner stockpot) with some grinding, for a prefilled batch run of biomass to biochar. This is the same mainframe used for the 20L 'Tinkerer TLUD' (on the TLUD page) and 200L oil drum TLUDs but for an in between sized 100L batch of biochar. You might be able to use some cogeneration on the lid eg. a small teapot billy. The downside of this design is that the stockpot can't be used for relatively efficient water quenching, pH adjustment and inoculation in pot, as found with the SBS.
A 6" chimney flange could be fabricated or purchased to secure the chimney to the lid via drilling the flange into the lid, providing a stable platform for windproofing and stabilising the chimney during the burn and avoiding the need to touch a super hot chimney after a burn - even with welders gloves.
Put on the welder's gloves. For a quench/water-free method, it's possible after a burn to carefully raise the ends of 2 square tube pieces on one side, using the opposite tube/stockpot contact points as a lever fulcrum and slide off the lid+chimney away from you - but this needs to be tested. Then, remove the 2 square tubes, place a few inches thick layer of premade biochar (preferably finely milled) on top of the top coals, lift the stockpot with one person holding a handle on each side and place it on flat ground next to the bricks - this will essentially starve the remaining biochar coals of Oxygen and avoid turning it to ash. There is a small risk of touching the outside of the stockpot while moving it and getting a nasty burn on your legs - wearing thick cotton pants would be advisable.
Alternatively, for a water-based quench after a burn, with welders gloves, carefully slide off the lid + chimney (using the same method as described above), remove the square tubes then pour buckets of water over the biochar or use a hose with water if you can access one and completely put out the hot biochar coals. It's not great water conservation to do so as the excess water that isn't turned into steam (good for activation but keep your distance) will exit the base of the stockpot. If the stockpot is reasonable quality, the metal shouldn't deform with the hot-cold shock of the cold water touching the hot stainless steel.
Another advantage of the SBS idea is visibility of the burn - which the STBS does not have - so you know exactly the right time to quench the fire and avoid wasting/converting biochar into ash. An infrared laser thermometer could be used with the STBS to work out the outside temperatures of the stockpot to predict when a burn is over but would need to be calibrated to the feedstock. Another method is when the flame stops exiting the chimney, the burn is over but a little innacurate. Whatever works best for you - maybe you can work out a better way to do it - just don't burn yourself.
The STBS could still be used as a firepit too.