
The 'Navigator Kitchen'

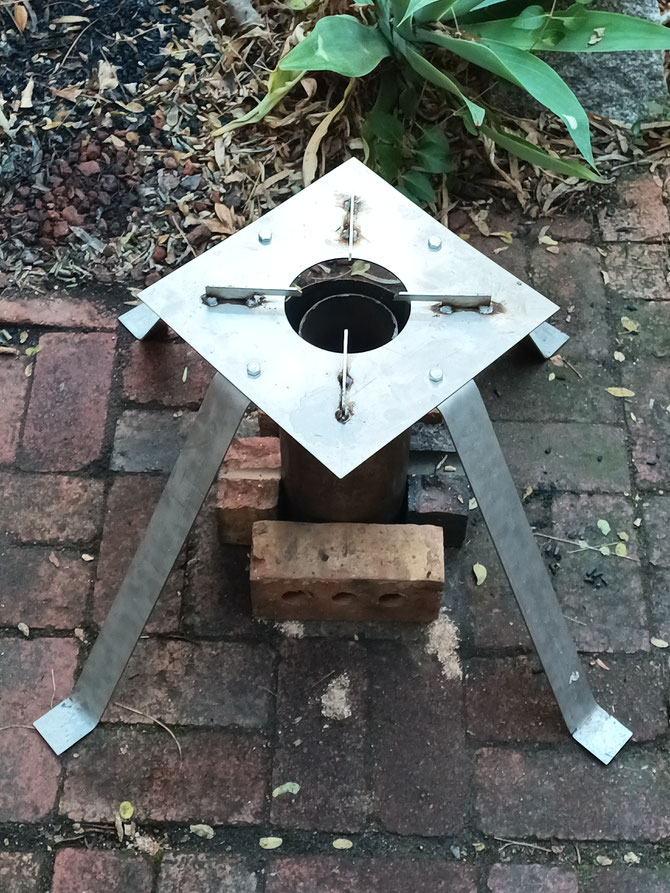
Why not build the 'C negative' kitchen of your dreams? The Universal Pot Stand (UPS) is designed for ergonomics (you can sit on a chair while you cook), small or large manufacturing, bolt-on modularity, logistics (it can be packed down), durability (2.5mm 304 ss), suitability for most stainless cookware and is stove/burner agnostic eg. 'Navigator Burner' or as other stoves/burners evolve over the years, the UPS should stand the test of time.
I used 304 2.5mm stainless steel for the parts. The CAD can be viewed in 'LibreCAD' cross-platform software. Maybe you could form a TLUD Science-Art collective and pool resources, share parts and swap knowledge and skills?

'Navigator Burner'

No patents or patents pending. This 'Navigator Burner' design is an adaptation for a grinder and steel tube based on the Top-Lit UpDraft (TLUD) mainframe design principles which are completely 'Open source' to use.


Technical specifications
-'Multi purpose' tech
- pasteurization/WASH
- cooking
- biochar cogeneration/by-product
- Burner weight: 1.31kg (without heat and wind shield)
- Burner volume: 3 litres
- Wood pellets. Weight (max): 1.15kg
- Cost: 15kg bag wood pellets/1.15kg per burn (max) = 13 burns so at $19.95 per bag, $1.53 per burn
- Approximately the same fuel efficiency as the Navigator Stove 'Backup' TLUD stove (see 'Navigator Stove (NS)' page above) but with double the burn time
1st burn
- wood pellets
- ambient temperature: 15 degrees Celsius
- 5m startup
- 3L billy 2.8L water boiling time: 35m
- simmering for the rest of the burn
- burn time: 2h1m
- Biochar recovery: 100%
2nd burn
- ambient temperature: 11 degrees Celsius
- 5m startup
- 14L water in 15L stainless stockpot
- t=0, 10degsC
- t=30, 29
- t=60, 47
- t=90, 63
- t=120, 74
- t=129, 72
- burn time: 2h9m
- Biochar recovery: 100%
Meets the 'safe zone' for safe water sterilisation (see research paper below)
I take no responsibility for stability issues with this design though it does seem to be stable on a flat surface with the bottom of the tube squared off at 90 degrees. The stabilised heat and wind shield tube should work well for unprotected/exposed outdoor use of the burner and UPS but needs to be tested.
I should mention too that the heat and wind shield and bricks (or rocks) will interfere with quench system using an oven tray/saucepan/pot. In this design, a soil 'quench' can be used to finish the burn which could be appropriate for some local conditions eg.water scarcity with available environmental soil.
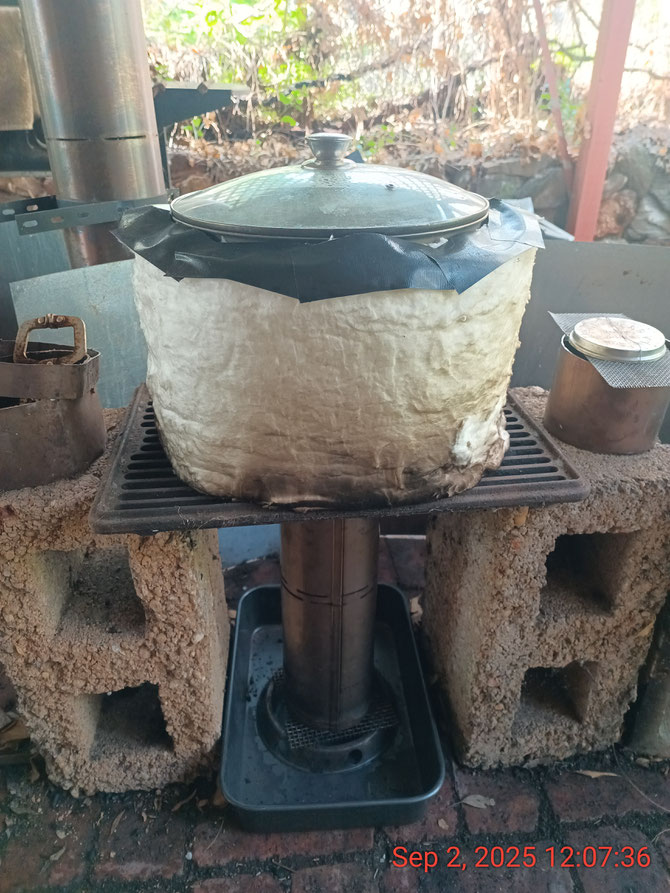
Operation
-position the burner in the centre of a thick oven tray or thick bottomed saucepan on a flat surface
-fill the burner with fuel eg.wood pellets, rice husk pellets, bamboo, sticks etc. up to desired level to a maximum height of 10mm below the secondary air slots
-add a circle of firelighter gel 2cm in from the tube edge (or 3 cotton wool buds soaked in kerosene)
-position the UPS centrally above the burner
-light the burner from the top with a wooden skewer lit at one end (or a BBQ lighter)
-position the cooking accessory eg.15L stainless stockpot on top of the stove top after 5 minutes
-ready to run without adding any additional fuel during the burn
At the end of the burn:
-flame goes out and usually smoke follows
-put on some leather gardening gloves (and keep them on until the water quench or soil quench has been performed)
-remove the cooking accessory
1-Water quench (if enough water is available). Add water from above the top of the burner eg.water jug, for initial quench of biochar pellets until oven tray/saucepan/pot water level is above the primary air slots (mind the steam)
-remove the UPS holding 2 legs
-lift the burner vertically eg. 20cm above the oven tray/saucepan, with billy lifters/pliers/C clamp, and the biochar will fall out the bottom (may need to use a stick to push out the biochar)
-using a stick, stir the biochar into the water and there will then be a complete quench
-wait 10 minutes then, wearing leather gloves, empty the oven tray/saucepan/pot into a bucket eg. a 20L stainless one, then it will be ready for the next burn
OR
2-Soil 'quench'. Next to the burner, dig some soil and make a pile before the burn.
-remove the UPS holding 2 legs
-fill up the air space between the heat and wind shield and burner plus the air space inside the burner, above the biochar, with soil
-leave for 10 minutes
-lift the burner vertically with billy lifters/pliers/C clamp until all the biochar and soil has fallen out the bottom (may need to use a stick to push out the biochar and soil)
-mix the biochar in with the soil inside the shield space
-lift the shield with billy lifters/pliers/C clamp and remove it
-add the biochar and soil mix back into the soil hole, next to the burner - the climate and microbes will love it!)
END


Navigator '5 inch Chimney Flue' Burner
Here's a proposal for my next TLUD aimed at acheiving pasteurization at 71 degrees Celsius under an hour of 14 litres of water in a 15 litre ss stockpot.
Tech specs for prototype
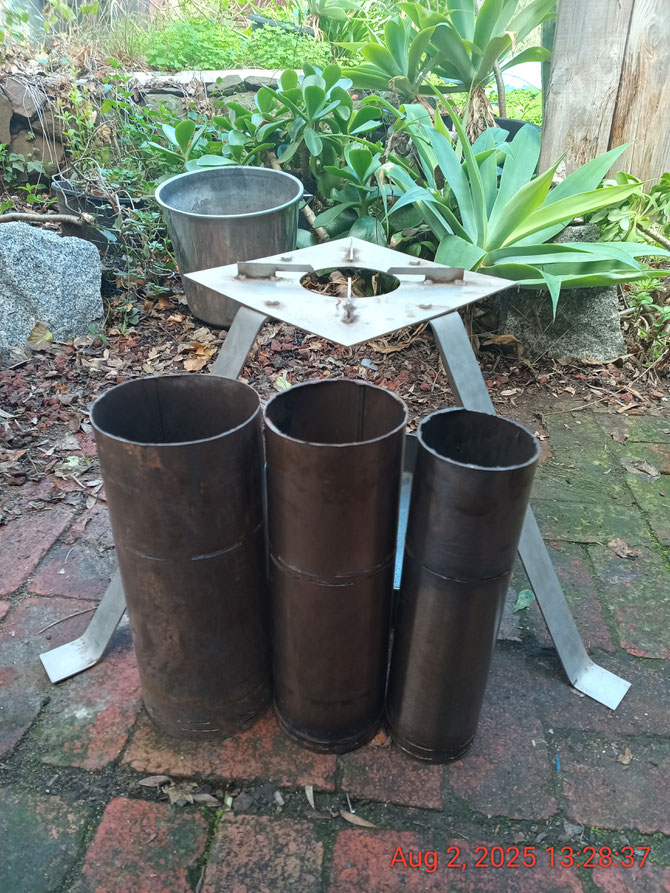
- modded 'Navigator Burner' TLUD mainframe
- 370mm high section of 5" 304 chimney flue (eg. Pivot, Flomet etc.)
- 10mm high primary air slot row, alternating with 20mm high primary air slot row (smallest slots possible)
- 230mm high secondary air slot row, alternating with 240mm high secondary air slot row (smallest slots possible)
- 130mm long chimney (above top secondary air slot row) for UpDraft
- biomass wood pellets maximum reactor volume at 220mm high (10mm below bottom row of secondary air slots): 2.7L volume, which should easily cover fuel for pasteurization eg. could pasteurize 14
litres, cook a breakfast and maybe still have some spare flame ;)
***
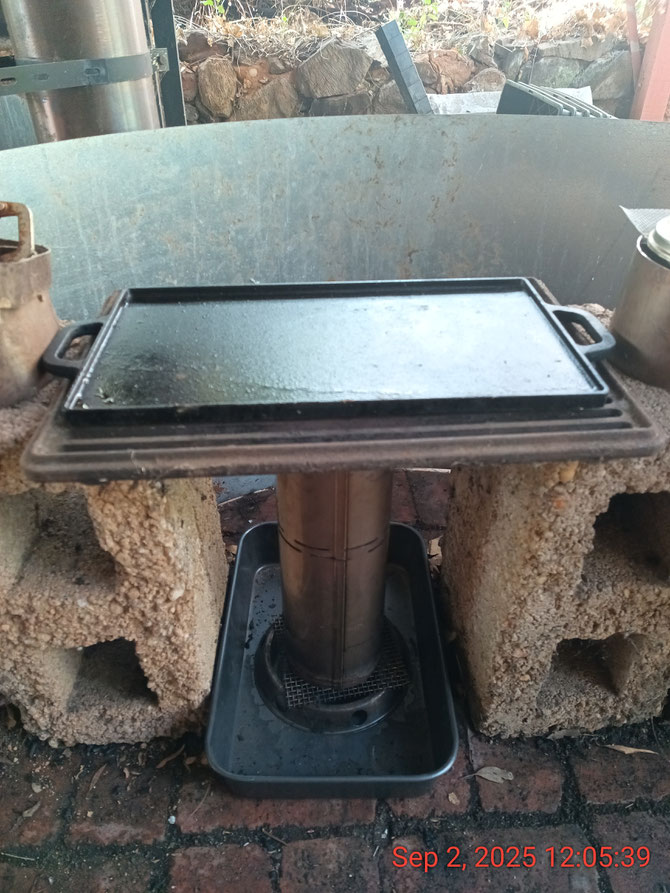
1st burn on Navigator '5 inch Chimney Flue' Burner
- ambient temperature: 11degsC
- wood pellets
- fuel weight: 1kg
- 5m startup
- 14L water in 15L stainless stockpot
- t=0, 10degsC
- t=10, 22degsC
- t=20, 43degsC
- t=30, 61degsC
- t=40, 72degsC
- Burn time: 40m,quenched at t=41
- Biochar recovery: 100%
- pasteurization OK
- Reached 71degsC for safe pasteurization. See article below:
Energies 2020, 13, 936; doi:10.3390/en13040936
I'll do a couple more burns just to make sure it wasn't a fluke and be scientifically rigorous.

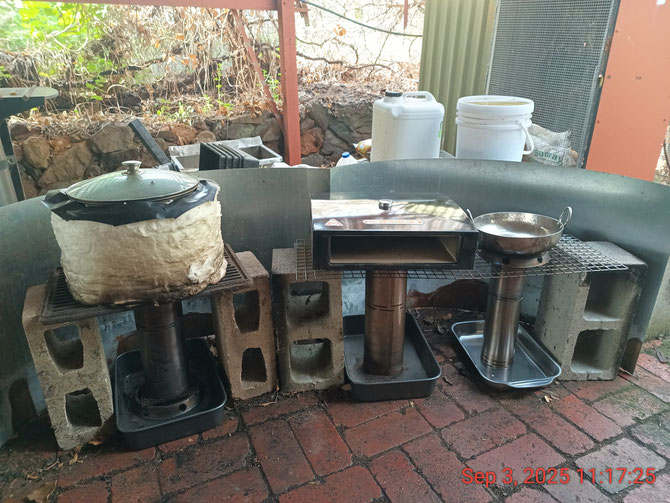
From left to right: 5" burner with oven tray quench system (eg. stockpots for water pasteurization/large stews/soups/rice, BBQ plate, wok etc.), 'Bakerstone' oven with 5" burner (pizza tray/bread tray/10" cast iron skillet) with oven tray quench system and a 4" burner with oven tray quench system (slow cooking eg.curry).
I should mention that the stovetop on the RHS uses a section of 1" 304 welded mesh panel wired onto 1 length of galv slotted angle for reinforcement at the back of the stovetop.
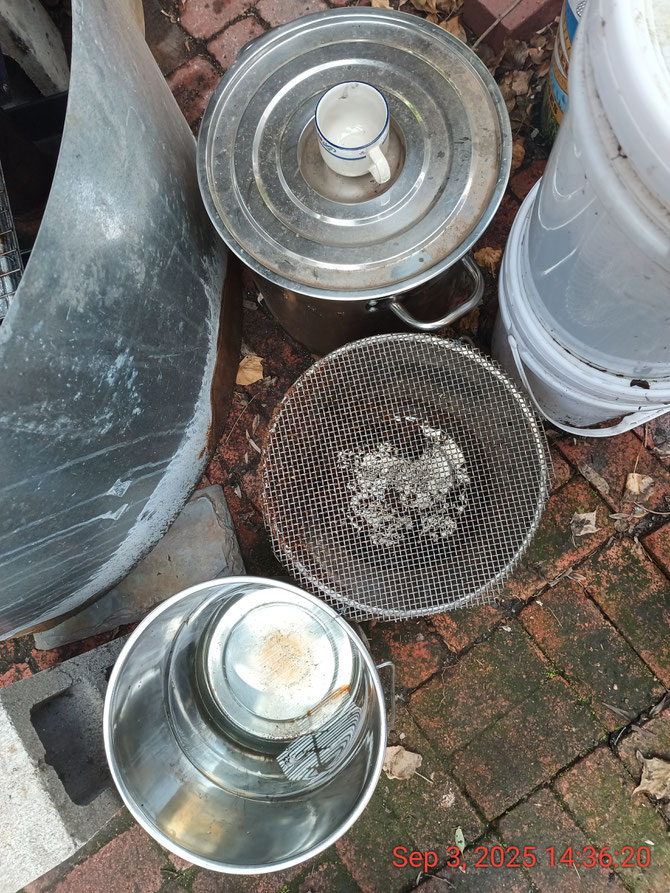
At the bottom of the photo, potable water (eg. from the 'Permafilter 20L', top right) for quenching in a 20L stainless bucket. Above/centre, mesh biochar collector and quench/'smoke water' water reservoir filled from the oven trays in the NK after a burn. Top, 50L stainless stockpot for quench/'smoke water' siphoning from the mesh covered bucket that can be used for seedlings to increase the growth rate.
The biochar pellets collected (which should be bacteria free using potable water from the 'Permafilter 20L' for quenching) can be used in the 'Permafilter 20L' for water filtration (see the 'Permafilter 20L' page for more information). When the biochar needs replacing in the Permafilter 20L, the spent biochar pellets can be used for sanitation eg. a 20L stainless piss bucket or 2 x 20L plastic bucket toilets with bokashi added too. When the toilets are emptied, the spent 'humanure' can be added to a compost pile with additional bokashi. When the compost is ready, it can be added to growing systems, such as wicking pot systems, swales and Zai pits. I call this cascade of biochar use 'Carbon Removal in a Cascade of Uses' (CRCU).
Conclusions
Maybe the 4" and 5" 304 chimney flue Navigator Burner and UPS or besser block/mesh stovetop could be the best options as an outdoor institutional cooking and WASH system. There's also the Navigator 'Awesome' V2 on the 'Bush Survival System' page. There's also the Navigator 'Backup' V2 on the 'Navigator Stove' page for a more compact TLUD system using a simple pot stand, lighter weight and more compact form factor, useful for a range of use cases.
I believe now that 'Natural Gas', or what I prefer to call it as 'Unnatural Methane' ('Ancient Sunlight'), is becoming obsolete very quickly as 'Carbon negative' technology with permanent Carbon removal, mainly in the form of biochar, takes over. 'Ancient Sunlight' as opposed to practically unlimited 'New Sunlight' for biomass feedstock shouldn't be mined and promoted as a clean green 'Transition fuel' ('Greenwashing', possibly a lack of divestment imagination and out of touch with the Earth's' climate reality) when the above 'Carbon negative' alternative works very well and removes Carbon rather then emitting it. In my opinion, the only real transition is 'Carbon negative' technology replacing 'Carbon emitting' technology.
'Carbon negative' bioelectricity using biomass waste is complementary to 'Big batteries', with biochar as a byproduct via cogeneration possible (and desirable) and can provide biochar for advanced Carbon-based materials used in solar PV panels, batteries and supercaps though in operation they are 'Carbon neutral'. For eg., an area of research I've been looking into recently is a 'ceramic biochar MOF for solid state battery electrolytes' in perplexity.ai 'Labs' using web and academic sources, as a starting point for further research.
I guess what I'm saying is if technology problems can be solved for Earth sustainability, predicting a hotter and more unstable Planet in the future, those technologies can be used on Mars and possibly exoplanets too - if we ever get that far...There's no shortage of CO2 on Mars, in fact plenty of Cyanobacteria exists that feeds on CO2, and can be made into fuel pellets to run on TLUDs. The biochar produced from the TLUDs can be used for advanced Carbon materials, and I understand the 'Curiosity' Mars rover discovered clay, and presumably there are many more deposits, that could possibly be used for the ceramic component of MOF hybrid solid state batteries. Not sure about the metal deposits for the MOF, though Manganese (Mn) would be great! Using ceramics in a battery increases it's operating temperature so could be suitable for semi-arid and arid areas on Earth, which is largely desertifying with climate change, or on Mars or elsewhere. Wherever a Civilisation is located, the ability to build appropriate and sustainable tech I believe is essential for survival. Also, no potable water = no Civilisation.
Maybe one day we'll have a 'Fossil Free' Civilisation but it's a very long journey to get there.
Back to TLUDs...
If all of this is too hard or costly or no access to tools, materials, skills, fabricators etc., then there's also the 'Fabstove' approved by Dr TLUD - but, at this stage is only available in South Africa and the U.S.A. and is going to cost you some clam shells.
http://www.ekasi.energy/
It's worth checking out the video here:
https://blueskybiochar.com/products/fabstove-tlud-clean-cook-stove-coming-soon
Learn by building. You won't regret it!:)